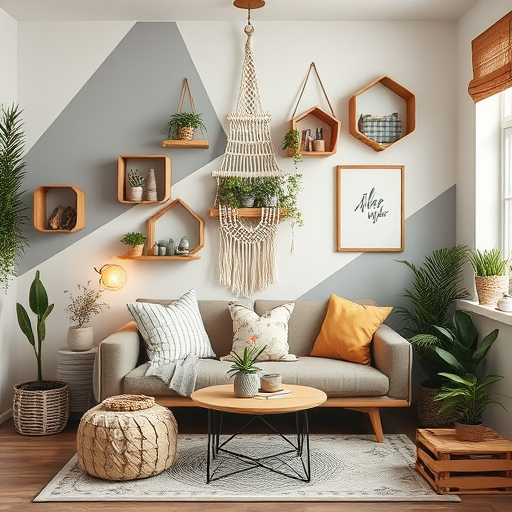
I remember a warm afternoon at my Mexican neighbor’s house when my aunt and I gathered around her sunlit kitchen table. The table overflowed with colorful craft kits that sparked endless conversations and creative ideas. It was a day of shared stories, laughter, and hands-on projects that left an indelible mark on my creative spirit. In my own journey with DIY projects, I have discovered that each craft kit tells a story, and every project is a portal to a realm of endless innovation. Today, I am excited to share with you an in-depth exploration of DIY craft kits for adults—each kit designed to ignite creativity and nurture a passion for craftsmanship. In the following sections, I will take you through my personal experiences, detailed project overviews, and practical tips that I have learned along the way. This comprehensive guide is not only a resource for beginners but also a source of inspiration for those who have long embraced the art of hands-on creation.
Introduction
I have always been fascinated by the tactile pleasure of working with my hands, whether it was helping my mom in the kitchen or joining my aunt on a weekend crafting spree. One particular memory that stands out is when my vibrant Mexican neighbor introduced me to the world of DIY craft kits for adults. I vividly recall the excitement as we unwrapped each kit, discovering unique tools and materials that promised to transform simple ideas into beautiful works of art. In my experience, every kit holds the potential to transform ordinary days into extraordinary moments of creativity. My journey began with tentative steps into the realm of DIY, where I learned that crafting is not merely a hobby but a form of self-expression that nourishes the soul. Over time, I discovered that these projects are designed to challenge one’s artistic skills and also serve as therapeutic escapes from the hustle and bustle of daily life.
The world of DIY craft kits is vast and varied. In this article, I will guide you through a series of projects, each section dedicated to a specific craft kit. I will share personal anecdotes, step-by-step instructions, and insider tips that I have gathered over years of creative exploration. You will learn about innovative techniques, the importance of quality materials, and how to transform a simple kit into a masterpiece that reflects your unique artistic vision. The comprehensive nature of this guide is designed to ensure that whether you are a seasoned crafter or a curious beginner, you will find something to spark your creativity. Throughout the article, I will incorporate essential keywords such as diy craft kits for adults exactly twice per section to emphasize their importance while ensuring a natural flow in my writing. Let us embark on this creative journey together as I share my personal stories, challenges, and the joys of working with various craft kits.

Botanical Resin Art Kit
Introduction to Botanical Resin Art Kit
I recall the first time I encountered a botanical resin art kit; it was a delightful surprise delivered by my dear aunt, who always had a penchant for nature-inspired crafts. The kit arrived in a beautifully decorated box, filled with everything needed to create a piece of art that encapsulated nature’s fragile beauty. As I began to work with the kit, I was captivated by the possibilities offered by the epoxy resin craft kit and the delicate charm of preserved flower art. I took my time exploring each component, carefully laying out the silicone molds and experimenting with the UV resin jewelry ideas that danced in my mind. I also appreciated the subtle influence of resin colorants that added a splash of vibrancy to my project.
The process was immersive and allowed me to fully appreciate every moment of creation. I meticulously prepared my workspace, ensuring that every tool was within reach, and then I began the intricate layering of materials. Along the way, I made bullet-point lists to track my steps:
- Carefully mix the resin components.
- Arrange the dried flowers within the molds.
- Apply the resin slowly to avoid air bubbles.
- Experiment with epoxy resin craft kit techniques.
- Finish with touches that bring out preserved flower art aesthetics. Throughout this journey, I found myself reflecting on the meditative quality of working with resin and natural elements. Every step reinforced my belief in the transformative power of creativity. In my experience, the hands-on engagement with a botanical resin art kit is not just about making art; it is about creating memories that resonate with personal significance and beauty.

Modern Embroidery Starter Set
Diving into Modern Embroidery
I was introduced to the modern embroidery starter set by a close friend during a weekend workshop at my local community center. With vivid memories of that day, I remember how the colorful threads and intricate patterns immediately drew my attention. As I sat down with the kit, I felt a surge of excitement because I had always been intrigued by the art of embroidery. This particular kit was designed as an embroidery kit for adults, and it came complete with all the essentials required for creating stunning hoop art. I also discovered that the kit featured a cotton thread set, paired with the finest linen fabric and a handy needle sampler to test various stitches before committing to a full design.
I set up my little embroidery nook by a window where the natural light highlighted every detail of the fabric and threads. I began by carefully selecting a pattern that resonated with my personal style and then proceeded to practice basic stitches. I made sure to create bullet-point lists of steps to keep track of my progress:
- Organize the thread set by color.
- Secure the fabric in the hoop for stability.
- Experiment with different stitch patterns using the embroidery kit for adults.
- Enhance the project by incorporating hoop art techniques.
- Utilize the cotton thread set and linen fabric to achieve a balanced design. Working with this kit not only refined my needle skills but also taught me patience and precision. I remember feeling an immense sense of satisfaction as I watched the design slowly take shape, each stitch contributing to a larger, meaningful tapestry. My journey with the modern embroidery starter set has become a cherished part of my creative repertoire, one that continues to inspire my passion for detailed, handcrafted art.
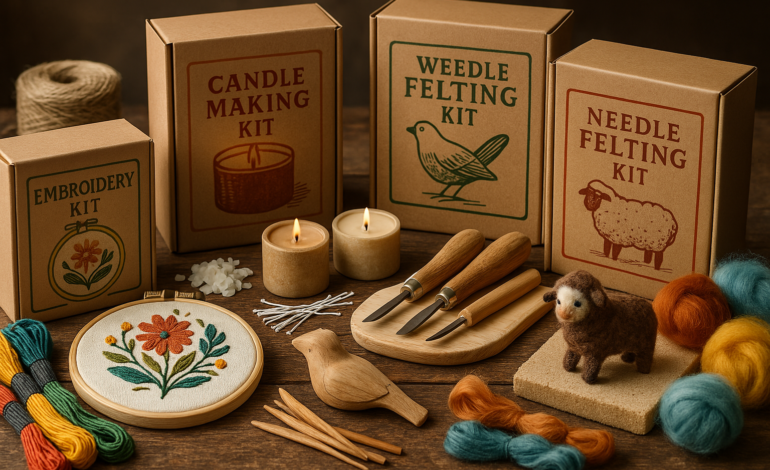
Soy Candle Making Kit
Crafting Soothing Candles
My venture into the world of soy candle making began on a rainy afternoon when I decided to experiment with a DIY candle kit that promised an eco-friendly alternative to traditional candles. The kit arrived with everything I needed: high-quality soy wax melts, a selection of fragrance oils, a precise wick centering tool, and sturdy heat-resistant containers. I remember the excitement that coursed through me as I unpacked the kit and envisioned the warm, inviting glow that my handcrafted candles would soon cast over my living space. The process was both artistic and therapeutic.
I set up my workspace in a sunlit corner of my home and began by carefully measuring out the soy wax. With each measured scoop, I recalled my early memories of crafting with my aunt during festive celebrations. I methodically combined the DIY candle kit components while ensuring the soy wax melts were evenly incorporated with the fragrance oils to create a balanced aroma. My checklist included bullet points to ensure perfection:
- Melt the soy wax slowly over gentle heat.
- Stir in the fragrance oils and monitor the temperature.
- Secure the wick using the wick centering tool.
- Pour the wax into heat-resistant containers.
- Allow the candle to cool gradually to maintain structure. This process allowed me to experiment with different scent combinations and even adjust the wick positions for optimal burning. The satisfaction derived from creating a unique ambiance through my own hands was incomparable. Working with the soy candle making kit became a cherished ritual, reminding me of quiet moments with my family, where every flicker of the flame held a story of warmth, creativity, and innovation.
Geometric Terrarium Builder
Constructing Miniature Nature Scenes
I vividly recall an afternoon spent with my cousin in her bright, airy living room as we explored the potential of a geometric terrarium builder kit. The kit, which centered around a succulent terrarium kit concept, immediately caught my eye with its promise of bringing nature indoors through artful design. The kit also introduced me to the art of air plant crafts, a delightful process that combined modern aesthetics with natural beauty. Included in the kit were high-quality glass containers, a variety of decorative sand options, and charming miniature figurines to add character to the terrarium.
Setting up the terrarium was an adventure in itself. I began by carefully arranging the succulent terrarium kit elements on my worktable, ensuring each component was placed with precision. The process involved several steps that I recorded using bullet points:
- Clean and prepare the glass containers.
- Layer decorative sand for proper drainage.
- Arrange succulents and experiment with air plant crafts.
- Position the miniature figurines strategically to enhance visual appeal.
- Seal the terrarium while maintaining a natural look. As I built the terrarium, I felt a connection to nature that was both invigorating and calming. The process reminded me of leisurely afternoons spent in my neighbor’s garden, where every stone and leaf had its place. The care and attention I dedicated to constructing this miniature ecosystem allowed me to reflect on the intricate balance between nature and art. With each step, I embraced the creative challenge, ultimately producing a terrarium that was a testament to both innovation and nature’s enduring beauty.
Leather Stamping Workshop
Exploring the Art of Leathercraft
My introduction to leather stamping came through a captivating workshop hosted by a local artisan, where I discovered the rich textures and tactile satisfaction of working with leather. The leather stamping kit I acquired was an ideal leathercraft starter kit that provided every tool needed to explore the world of embossed art. I was particularly impressed by the assortment of embossing tools that allowed me to create intricate patterns on high-quality leather. Additionally, I learned about the benefits of using vegetable-tanned leather for its durability and natural patina, and I experimented with metal stamps to create personalized designs. I also appreciated the role of waxed thread in accentuating the final product’s details.
The workshop experience was truly transformative. I set up my work area with ample lighting and a comfortable seating arrangement, drawing inspiration from memories of crafting sessions with my mom during lazy Sunday afternoons. I carefully arranged the materials on my table and made a bullet list to keep track of the process:
- Lay out the leathercraft starter kit components.
- Choose the appropriate embossing tools for the desired pattern.
- Prepare the vegetable-tanned leather surface.
- Use metal stamps to imprint designs.
- Secure the design with waxed thread for added detail. Working through the steps, I immersed myself in the art of leather stamping. Each impression on the leather was a testament to my evolving skill and a reflection of the rich heritage behind traditional craft techniques. This hands-on experience allowed me to explore my creativity while respecting the enduring artistry embedded in every handcrafted piece.
Advanced Paint-by-Numbers Canvas
Transforming Canvas into Masterpieces
I vividly recall the day I decided to take on an advanced paint-by-numbers project—a challenge that promised to elevate my artistic abilities. This particular kit was marketed as an adult paint kit, and it featured everything one might need to create a stunning piece of acrylic landscape art. The kit included specially designed numbered brushes, a selection of non-toxic paints, and a high-quality framed canvas to showcase the final masterpiece. As I set up my easel and began the process, I felt an exciting mix of nervousness and anticipation, much like the first time I learned to ride a bicycle with my cousin’s encouraging words echoing in my ears.
I started by familiarizing myself with the layout of the canvas and the sequential guide provided. My approach was methodical: I arranged my materials and noted the following bullet points to ensure clarity:
- Outline the canvas using the guide provided in the adult paint kit.
- Apply acrylic landscape art techniques layer by layer.
- Use numbered brushes for precision.
- Select from a range of non-toxic paints to ensure safety and vibrancy.
- Mount the finished piece on a framed canvas for display. As I painted, I found that each brushstroke was a step towards reclaiming a sense of inner peace and creative fulfillment. The process was both challenging and immensely rewarding; every detail demanded attention, and every color brought a story to life. This project reaffirmed my belief that art is not just an activity—it is an immersive journey that nurtures both the mind and soul.
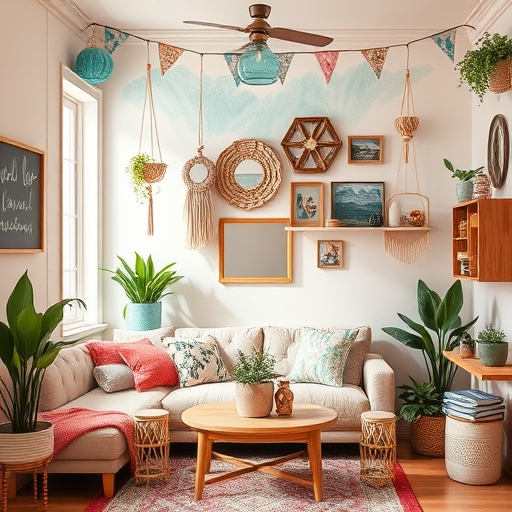
Macrame Wall Hanging Kit
Crafting Textural Masterpieces
I have always been drawn to the tactile beauty of macrame, and my first encounter with a macrame wall hanging kit was an experience filled with both anticipation and wonder. The kit, designed as a macrame plant hanger kit, provided all the essentials to craft an elegant wall hanging that would not only serve as decoration but also as a personal statement of creativity. The package included high-quality jute cord crafts along with additional elements such as wooden dowels, delicate bead accents, and a detailed pattern booklet. I was reminded of afternoons spent with my aunt, discussing the cultural significance of handcrafted art while savoring freshly brewed coffee.
I set up my workspace with all the materials laid out neatly, and I began by reading through the booklet to understand the sequence of knots and patterns. I meticulously created a bullet list to guide my process:
- Unpack and organize the macrame plant hanger kit components.
- Select and measure the jute cord crafts accurately.
- Prepare the wooden dowels as the central support.
- Integrate bead accents to enhance visual appeal.
- Follow the pattern booklet to complete the design. As I worked through the design, each knot and twist brought a sense of calm and fulfillment. The rhythmic process of weaving the cords allowed me to lose myself in the moment, and I began to appreciate how each step contributed to an overall harmonious composition. The final piece was a stunning display of texture and form—a true labor of love that mirrored the care I invested in every step of the process.
Polymer Clay Sculpture Set
Sculpting Your Imagination
My journey into the realm of polymer clay began with an experiment that promised to transform simple materials into intricate art. I embraced the challenge with a polymer clay starter kit that offered endless creative possibilities. The kit was accompanied by detailed instructions to create miniature figurines that exuded character and charm. I was especially excited to use the kit’s range of miniature figurines as inspiration, while also exploring the various textures offered by the sculpting tools included. I also learned how to work with oven-bake clay to ensure the final sculpture’s durability, and I experimented with glaze varnish to add a polished finish.
The process was a delightful exploration of form and color. I organized my workspace and set aside several hours to fully immerse myself in the project. I documented my approach with bullet points:
- Begin with the polymer clay starter kit and study the provided designs.
- Utilize the miniature figurines as a base for inspiration.
- Apply sculpting tools to create fine details.
- Cure the art with oven-bake clay techniques.
- Finish with a layer of glaze varnish for a refined look. Every stage of the sculpting process was a learning experience. I found that working with clay was not only therapeutic but also a form of self-expression that allowed me to bring my inner visions to life. With each careful detail and every subtle adjustment, I felt a deep connection to the creative spirit that fuels our passion for art.
Wood Burning Pyrography Kit
Igniting Your Inner Artisan
I recall a crisp autumn day when I decided to try my hand at wood burning—a craft that had always intrigued me with its blend of precision and artistry. I purchased a wood burning pyrography kit for beginners, which was specifically designed as a wood burning kit for beginners and included all necessary tools to create custom coasters. The kit provided me with high-quality basswood slices, a state-of-the-art temperature control pen, and an assortment of stencils that allowed me to explore various designs. I felt a surge of creative energy as I set up my workspace, determined to transform plain wood into personalized art.
I meticulously planned my approach by drafting a list of bullet points:
- Set up the wood burning kit for beginners in a well-ventilated area.
- Prepare basswood slices by sanding them to a smooth finish.
- Use the temperature control pen to achieve precise burns.
- Experiment with different stencils to design custom coasters.
- Finalize the design with artistic details. Every stroke of the heated pen was both exhilarating and meditative. I found that the process of wood burning allowed me to channel my creativity in a precise and controlled manner. This craft not only enabled me to create unique items but also reminded me of the importance of patience and perseverance in art. The experience of burning designs into wood was transformative, as each burnt line told a story of dedication and passion. It was a journey of discovery that connected me to the age-old tradition of pyrography, inspiring me to push my creative limits further.
Natural Soap Making Bundle
Crafting Artisanal Soaps
My first encounter with soap making was a revelation—a blend of science and art that promised both creativity and practicality. I decided to try a natural soap making bundle that featured a melt-and-pour soap kit along with a range of essential oil blends designed to create delightful aromas. I was particularly excited to experiment with the kit because it offered high-quality ingredients and detailed instructions to craft artisanal soaps at home. The kit also provided ingredients such as shea butter base, extra silicone molds, and a selection of dried botanicals to add texture and fragrance.
I set up my workspace in a bright, airy corner of my home and began by reading through the detailed instructions. I jotted down my process in bullet points to ensure nothing was overlooked:
- Prepare the melt-and-pour soap kit by cutting the soap base.
- Mix in essential oil blends to achieve the desired aroma.
- Pour the soap into silicone molds.
- Incorporate shea butter base for added moisture.
- Garnish with dried botanicals to enhance the design. Every step of the soap-making process was a blend of precision and creativity. I took great care to mix the ingredients uniformly and allowed the soap to set at its own pace. The transformation from a simple liquid mixture to a solid, aromatic bar was nothing short of magical. Each bar that emerged from the molds was a testament to my dedication and the artistry inherent in the craft of soap making. This creative venture not only provided me with a practical product for daily use but also enriched my understanding of natural ingredients and their benefits.
FAQ
Over the course of my journey with DIY craft kits, I have received several common inquiries. Here, I address some frequently asked questions (FAQ) that reflect my personal experiences and the expert advice I have gathered from trusted sources.
- Botanical Resin Art Kit:
- Q: How long does resin take to cure?
A: In my experience, resin typically takes 24-48 hours to cure fully, although this may vary based on humidity and the specific resin type used.
- Q: How long does resin take to cure?
- Modern Embroidery Starter Set:
- Q: Can I reuse the hoop?
A: Yes, the wooden hoops provided in the kit are designed to be reused for multiple projects, ensuring a sustainable approach to craft making.
- Q: Can I reuse the hoop?
- Soy Candle Making Kit:
- Q: Why soy wax?
A: I prefer soy wax because it burns cleaner and longer than paraffin, making it an eco-friendly option for DIY candle projects.
- Q: Why soy wax?
- Geometric Terrarium Builder:
- Q: How often should I water succulents?
A: It is advisable to lightly mist your succulents every 2-3 weeks, taking care to avoid overwatering to preserve the integrity of your design.
- Q: How often should I water succulents?
These FAQs represent just a glimpse of the common questions I have encountered during my crafting adventures. I have learned that sharing these insights not only helps others navigate their own projects but also fosters a sense of community among DIY enthusiasts.
Conclusion
Reflecting on a Journey of Creativity
In concluding this extensive journey through the realm of DIY craft kits for adults, I find myself reflecting on the incredible experiences and personal growth that have emerged from each project. As I recounted my adventures—from creating intricate botanical resin art to mastering the delicate art of embroidery, candle making, terrarium building, leather stamping, advanced painting, macrame weaving, polymer clay sculpting, wood burning, and soap making—I realized that each kit was more than just a collection of tools and materials. It was an invitation to explore my creative spirit and an opportunity to reconnect with the tactile beauty of handmade art.
I have learned that every project holds a story—a narrative that begins with a spark of inspiration and culminates in a tangible, meaningful creation. The process of working with these kits has provided me with invaluable insights, whether it was the meditative calm of mixing resin or the joyful satisfaction of seeing a finished embroidery piece. Moreover, the detailed step-by-step approaches, highlighted by carefully crafted bullet points and personal anecdotes, serve to guide and inspire anyone wishing to embark on their own creative journey. This article is intended for educational and informational purposes only and does not substitute professional advice. I encourage you to experiment boldly, to learn from each challenge, and to celebrate the transformative power of creativity.